
Contents
Crafting a Garden Oasis: How I Saved Nearly $100 with a DIY Solar Fountain from Action
Budget-friendly products from discount stores can often deliver pleasant surprises. In recent months, we’ve tested various items, including AirTag-like trackers, smartwatches, and label printers. While these usually resulted in modest savings, this time was different. With a little effort, I managed to save nearly $100. Instead of buying a pre-made product, I decided to build my own garden fountain.
This project was funded independently by our editorial team, and the manufacturer had no influence on the content of this article.
The Dream of a Tranquil Garden (Without Breaking the Bank)
After moving into a house with a garden, I quickly found myself spending evenings outdoors. I’d set up a lounge chair, turn on the garden lights, and enjoy hours with a good book. Yet, something was missing to complete the ambiance of blissful relaxation. That’s when a garden fountain became one of my must-have additions, alongside more greenery.
However, finding the “right” fountain proved challenging. A high-quality, substantial model could cost over $250. Cheaper fountains, often priced around $25, were typically less than eight inches tall or simply looked tacky. My ideal seemed to be a Japandi-style fountain – elegant, not miniature, and far from gaudy. The catch? My dream model retailed for approximately $112. That felt like a considerable sum for what was, essentially, a personal indulgence.
From Inspiration to Creation: My DIY Solar Fountain Hack
Fortunately, online algorithms quickly picked up on my interest in fountains. My feeds started flooding with creative inspirations, and that’s when I discovered the possibility of constructing my own fountain using a simple solar mechanism and planters. It seemed incredibly straightforward, so I decided to give it a try.
The first step was hunting for the solar fountain mechanism itself at Action. This wasn’t as easy as it sounded, as solar fountains were trending on social media, often leaving shelves empty. After visiting several stores, I finally secured the mechanism and could then gather the remaining components.
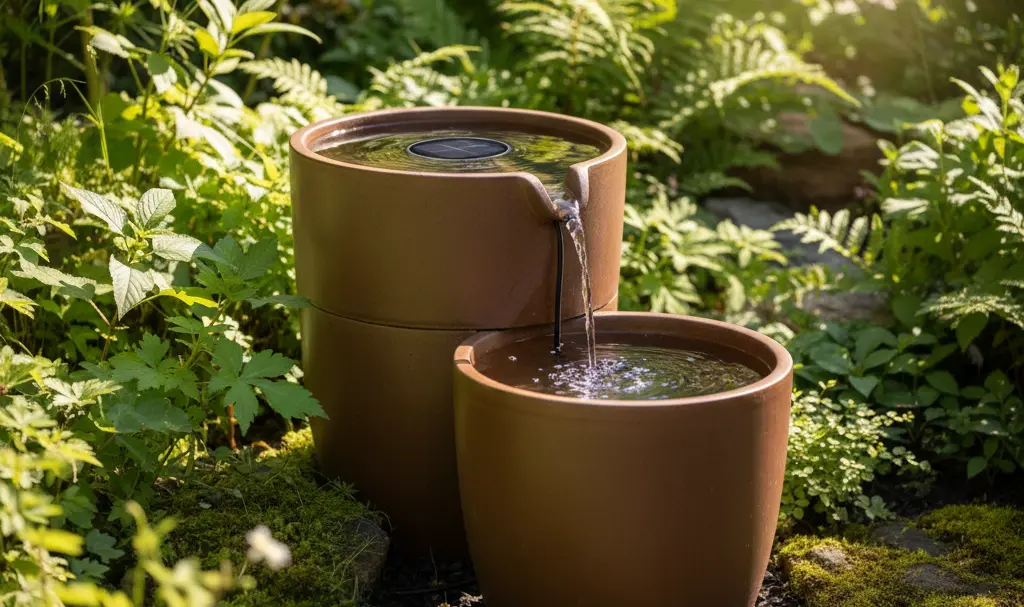
With all the necessary items in hand, I got to work. I glued the bases of two planters together to form a stable structure. Inside, I placed a bowl to serve as the water reservoir, filling the space around it with soil and small, dark decorative stones. Finally, I inserted the solar mechanism and selected an appropriate nozzle.
I opted for a brown color scheme and a symmetrical design for my fountain. However, Action stores offered a variety of ribbed planters and bowls that would easily allow for replicating the design sold by stores like Castorama. Of course, any model can be repainted to your liking, perhaps with spray paint available at discount retailers.
Interestingly, Castorama itself offers a planter model with almost identical dimensions to the fountain they sell, perfect for a DIY project.
The Cost-Saving Breakdown: DIY vs. Store-Bought
Ultimately, I paid approximately $7.50 for the solar mechanism, $8 for two planters, $0.75 for the bowl, and $0.75 for the decorative stones. In total, I spent just under $17.50 for a fountain remarkably similar to my dream piece. If I had bought a ready-made fountain for that price, I would have only afforded a tiny, five-inch tall trinket.
My project features a minimalist design, but the internet, especially platforms like TikTok, is brimming with ideas for more elaborate and creative DIY fountain constructions.
Embracing Compromises: The Realities of a Budget DIY Fountain
While visually appealing, a DIY fountain built from discount store components isn’t a direct replacement for a higher-end, pre-made model. Saving nearly $100 means accepting certain trade-offs. Firstly, the fountain’s operation is dependent on the weather; it performs less effectively, or not at all, on cloudy days.
Another consideration is the stability of such a construction. I occasionally had to adjust the nozzle or add water, especially on windy days when the stream wasn’t perfectly consistent. And finally, there’s the build quality. This is still a lightweight, budget-friendly mechanism that may be prone to minor issues.
However, feedback from various user groups suggests that while some solar fountains may only last a month, others can operate for a second season or even longer. It’s often worth noting that blockages are a common issue, and simply cleaning the filter can restore the fountain to normal operation.
DIY vs. Store-Bought: A Detailed Comparison
To provide a fair perspective on the cost and feature differences, here’s a comparison between a typical store-bought garden fountain and my DIY version:
- Price:
- Store-Bought Garden Fountain (e.g., Jumi Sakai): Approximately $100-$120
- DIY Fountain from Action: Approximately $7.50-$12.50 (mechanism + materials)
- Power Source:
- Store-Bought: Mains powered (12V cable)
- DIY: Solar-powered
- Operational Stability:
- Store-Bought: Very high (consistent operation)
- DIY: Variable – dependent on sunlight
- Lighting:
- Store-Bought: 6 LED points
- DIY: RGB LED, automatic after dark
- Assembly:
- Store-Bought: Ready-made product (“plug & play”)
- DIY: Requires self-assembly
- Maintenance:
- Store-Bought: Virtually maintenance-free
- DIY: Requires occasional adjustments (water, nozzle, positioning)
- Pump:
- Store-Bought: Integrated, stable pump
- DIY: Small submersible pump
- Durability:
- Store-Bought: Higher, solid construction
- DIY: Budget mechanism, plastic planters
- Portability:
- Store-Bought: Limited (due to power cable)
- DIY: Full (no cables)
While it’s difficult to call the DIY fountain a direct substitute for a more expensive, store-bought alternative, the visual effect is remarkably similar. Any minor inconveniences become much easier to overlook when you realize you’ve saved approximately $100.
You might also be interested in our review of the best smartwatches of 2025 that left a very positive impression on us.
Frequently Asked Questions (FAQ)
What are the main advantages of a DIY solar fountain over a store-bought one?
The primary advantages are significant cost savings (potentially over $100), the ability to customize its appearance to perfectly match your garden aesthetic, and increased portability since it doesn’t require a power outlet.
What are the key limitations or compromises of a DIY solar fountain?
DIY solar fountains are weather-dependent, meaning they perform best on sunny days. They may also require more frequent maintenance, such as adjusting the nozzle or refilling water, and their overall durability might be less than that of a more robust, store-bought unit. Blocked filters are a common issue but are usually easy to clean.
Can I use any type of planter for this DIY solar fountain project?
Yes, you can use various types of planters, bowls, or containers. The key is to select materials that can be securely joined and hold water for the reservoir. You can also paint them to achieve your desired look. The original project used two planters glued together and a separate bowl for the water reservoir.
How long can I expect a budget-friendly solar fountain mechanism to last?
The lifespan of budget solar fountain mechanisms can vary widely. Some users report them lasting only a month, while others enjoy them for a second season or longer. Regular cleaning of the filter can significantly extend its operational life. Given the low cost, replacing the mechanism if it fails is often a viable option.
Source: Our own research. Opening photo: Gemini AI composite.