


Not every dedicated monitor has convenient buttons for changing settings, and even if it is, we can adjust the brightness, contrast and other parameters from the keyboard level much faster. However, the potential of ClickMonitorDDC does not end there – we suggest how to automate the change of image parameters depending on the time of day or the games and programs that we are currently using.

Contents

Why is it worth using ClickMonitorDDC and what is its principle of operation based on?
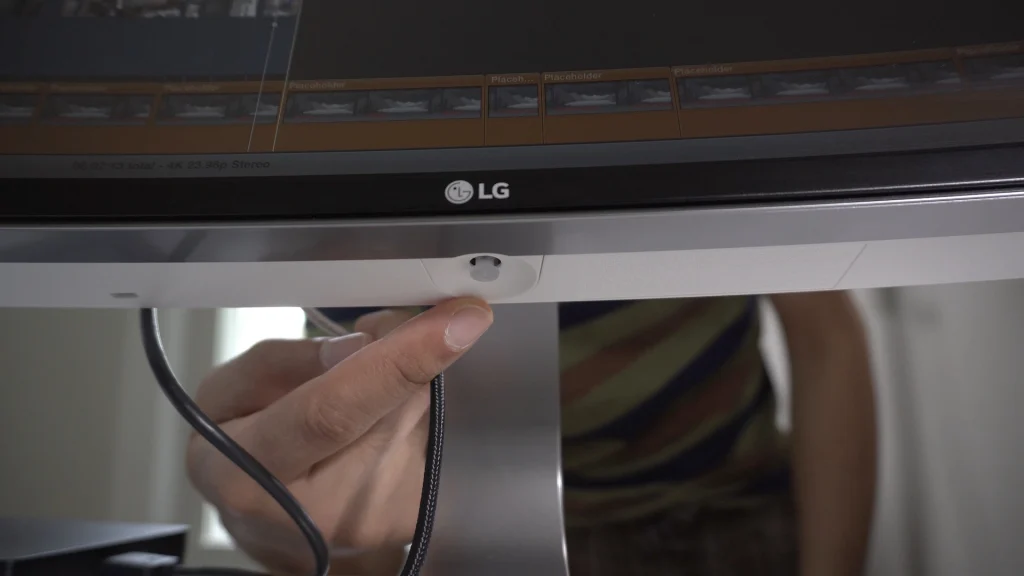
Using the monitor’s menus and physical buttons can be a real torment . Breaking through an unintuitive interface and navigating with more and more sophisticated inventions (joystick in LG monitors or buttonless control based on sensors hidden in the housing) would not be so terrible if we only configure image parameters once .
What if we need to adjust the contrast and brightness on an ongoing basis , depending on the time of day , running program or application or other personalization scenarios? Then there is a quite specific problem, because constantly jumping around the monitor menu can lead to the shoemaking passion of even the most patient users.
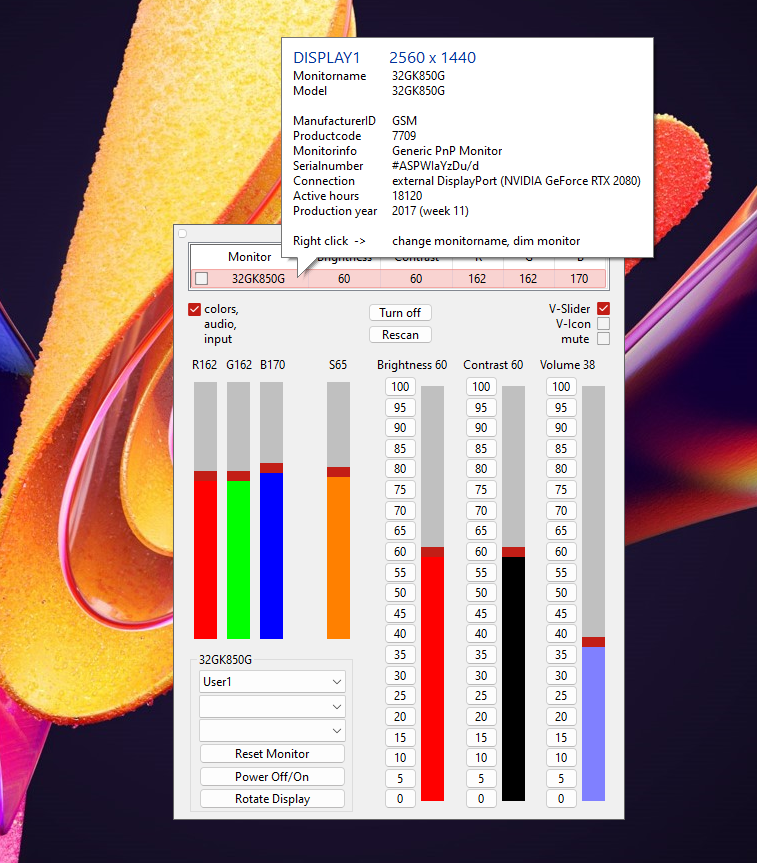
ClickMonitorDDC comes to the rescue , for which the above issues are not a problem. This compact program, which does not even require installation, uses the VESA-developed DDC (Display Data Channel) protocol . This standard allows not only to read the characteristics of the monitor, but also to remotely set the parameters of its operation – incl. brightness, contrast or color temperature.
The change of the last two components of the image is possible only for external monitors . Although the program is dedicated mainly to displays connected via HDMI, DVI, DisplayPort or VGA (does anyone else use this connector?), The most important functions also work on laptops – for example, task automation, more on which in a moment.
ClickMonitorDDC Features. What can we configure and how? List of variables and modifiers
Thanks to ClickMonitorDDC, we can:
- change parameters such as brightness , contrast, color saturation and RGB values of the monitor screen directly in the program or using keyboard shortcuts and command lines defined by us ,
- adjust the volume level in the same way (both the speakers built into the monitor and the system speakers),
- assign settings to a specific game or application that will be active after running the executable file,
- use the scroll of the mouse in conjunction with a defined key (or a combination of keys) to change the image parameters,
- synchronize the brightness on all displays in multi-monitor configurations ,
- check the information about displaying the image and make changes from the icons in the tray (optionally some of them can be turned off),
- freely change the signal source with abbreviations (HDMI, DisplayPort, DVI, VGA),
- turn off the monitor , reset all settings or rotate the screen
- create separate profiles with different settings that we can easily switch between.
There are many possibilities and it is impossible to list all configuration options here. So let’s start with the most important – the keyboard shortcuts settings that will allow us to understand the essence of the command line. The first example will show us how to change the brightness and contrast no matter what program we are in and what we are doing.
After starting the program, go to the manage hot keys tab (if the program window disappears somewhere, we will find it in the tray). In the key combination column , we set the key combinations that activate the settings defined in the command line on the right:
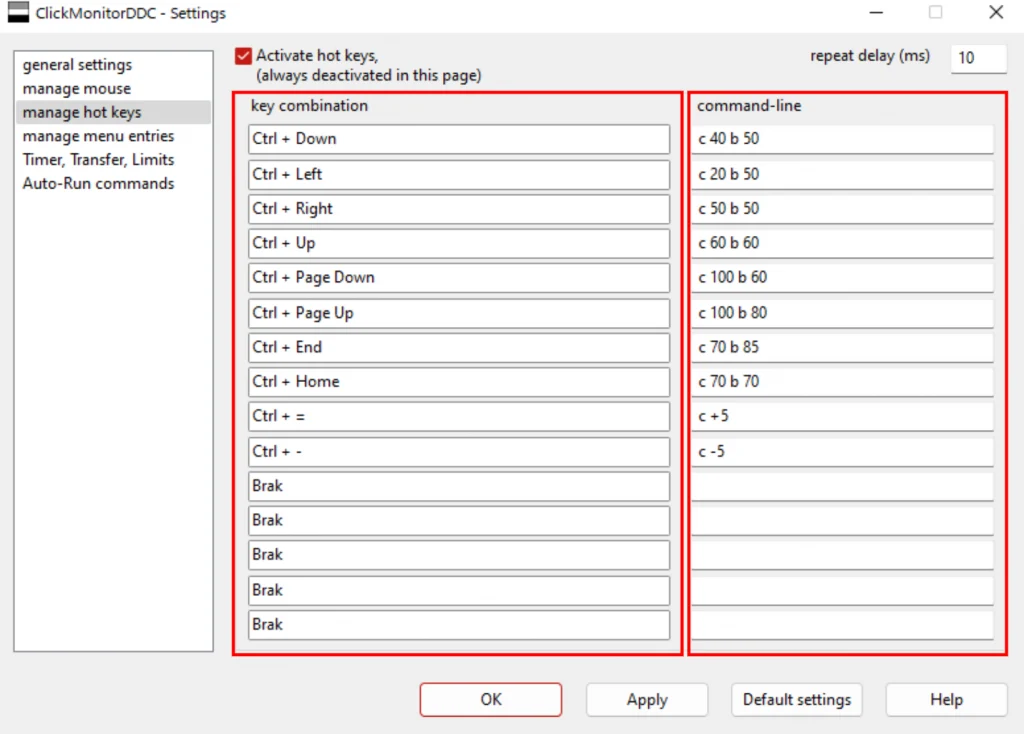
As you can see in the screenshot above, I used for this purpose, among others Ctrl key plus arrow keys ( directional keys ) and optional modifiers – and + . We precede the numerical value of a given indicator with the corresponding letter (in this case b for brightness – brightness and c for contrast – contrast) and a space (this also occurs when entering the next command).
Some examples:
b 50 c 50 – these commands will set a value of 50 for brightness and contrast
c + 5 – pressing the key combination will increase the current contrast value by 5
v 70 – set the system volume level to 70%
tb 50 c 50 tb 90 c 80 – alternate switching between commands, the second press will change the value of parameters from b 50 c 50 to b 90 c 80 , the third will restore the values b 50 c 50
If you’re wondering what else you can use on the command line, below is an extensive list of these variables along with a description of how they work :
| variable | optional modifier | value | a description of the action |
| b | + or – | 0 to 100 | setting the brightness (e.g. b 50) |
| c | + or – | 0 to 100 | setting the contrast (e.g. c 47) |
| r | + or – | 0 to 255 | setting the value for the red color (RGB) |
| g | + or – | 0 to 255 | set the value for the green color |
| l | + or – | 0 to 255 | set the value for the blue color |
| p | e.g. 6500K | allows you to select a color temperature profile (User for your own settings) | |
| j | eg Standard | selecting a profile settings for your monitor | |
| s | eg HDMI1 | selecting the signal source (HDMI, DisplayPort, DVI, VGA) | |
| k | + or – | 0 to 100 | setting the color saturation / digital glow from the graphics card driver |
| about | + or – | 0 to 100 | adjusts the volume level for the built-in speakers / audio output |
| v | + or – | 0 to 100 | setting the volume level |
| m | mute the sound | ||
| ? | information about the currently set value of brightness, contrast and volume level | ||
| in | screen rotation by 90 degrees | ||
| x | turns off all monitors (optionally, you can define a device to be turned off) | ||
| f | restores the default settings of the monitor | ||
| vol | switching between commands, e.g. tb 50 c 50 tb 90 c 80 – the second press will change the value of parameters from z 50 c 50 to b 90 c 80 | ||
| ; | 100ms time interval setting (can be used multiple times) | ||
| , | 1000ms time interval setting (can be used multiple times) | ||
| q | closes ClickMonit or DDC | ||
| With | Restarts ClickMonit or DDC | ||
| ! | runs any program, e.g.! notepad.exe |
After defining a number of commands that interest us, it is also worth taking a look at the general settings tab :

At this point, we can e.g. personalize the icons in the tray and define what parameters will be visible, synchronize the brightness on all displays in multi-monitor configurations or enable ignoring system settings related to the power source when using a laptop .
The restore values , reread values , verify values and save values options will also be important – unfortunately, each of them adds an additional delay when changing settings. I recommend disabling these options when they are not absolutely necessary for our configuration for the correct operation of the program. Any lack of visible changes may also result from the use of a read-only display mode , eg Games or Movie – then you should switch to the standard one from the monitor menu.
Automation. How to assign monitor settings to a program or game or activate them at a specific time?
If we are interested in automation consisting in changing image settings without our participation (apart from the original configuration), we can also assign the previously discussed commands from the command line to specific programs or games .
To do this, just go to the Auto-Run Commands tab :
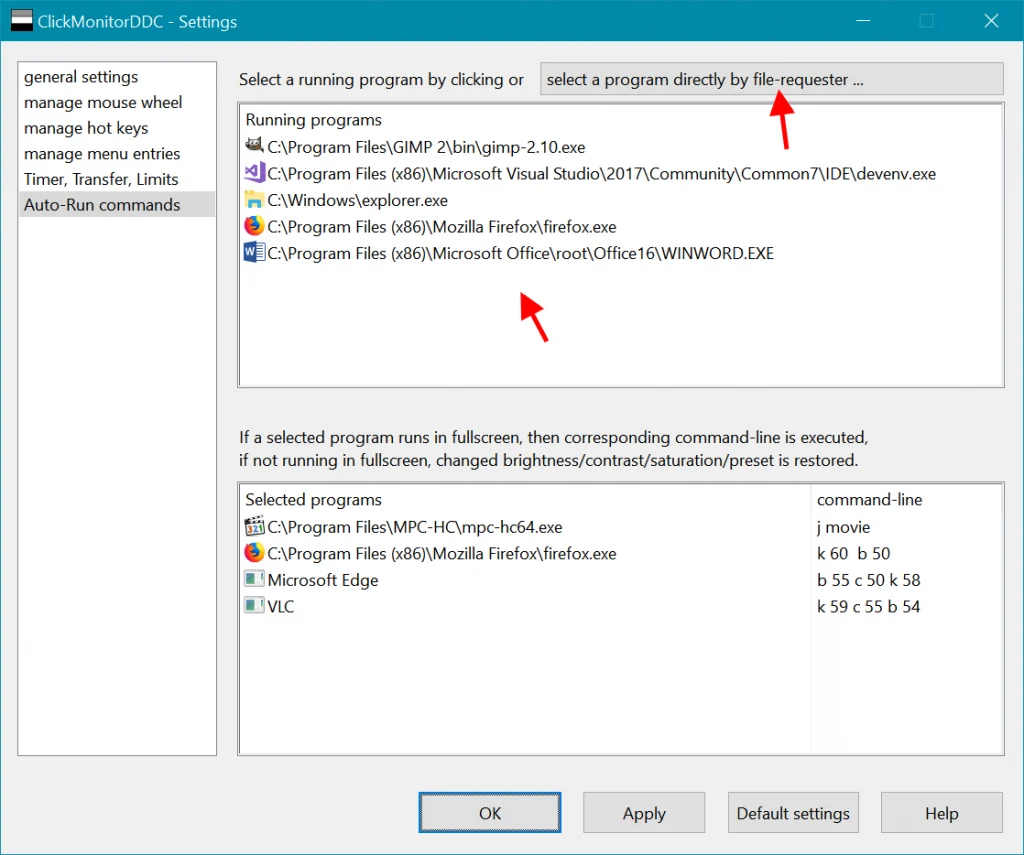
From the window at the top, you can select the active process (useful when the application or game you are interested in is already running), while the window at the bottom displays a list of already assigned commands . Selecting the location of the executable file is available after clicking the select a program directly (…) button .
The optional settings defined here can only be used when the program has been turned on in full-screen mode (check the box only in full-screen ). Remember that after exiting the application, all image parameters that were active before its launch will be restored.
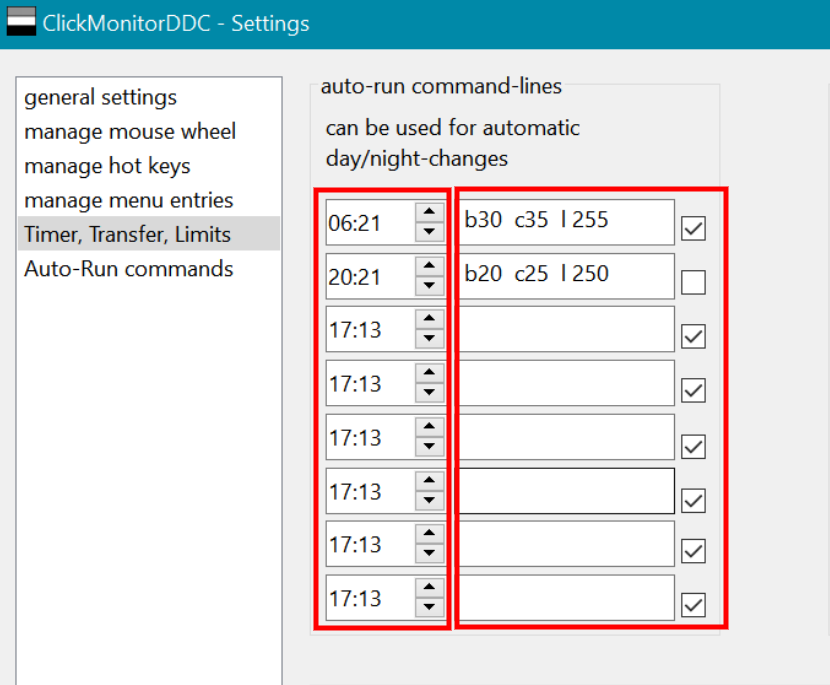
It is also possible to change the settings based on the time and time of the day. We will enable this option in the Timer, Transfer, Limits tabs – the essence of the operation is just as simple. In the left column we define the activation time of the parameters indicated by us, and in the right column we define them using variables and modifiers:
Configure your mouse and change settings on the fly
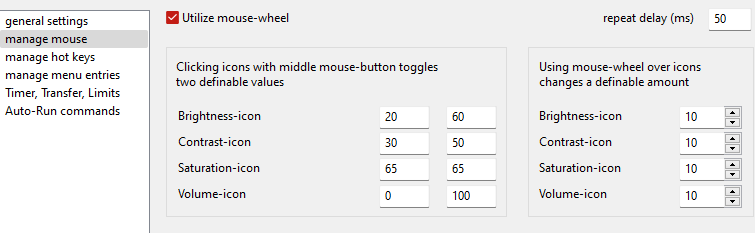
At the end, I should also mention the use of the mouse . This aspect has also been solved in an intuitive way – we can change the parameters after hovering the cursor over the icons in the tray , both by clicking on them with the middle mouse button (two definable values for each icon) and using the scroll function (here we can define what value will be used for scrolling).
The above options can be found in the upper part of the manage mouse tab window :
If we are not fans of tray icons, we will also use the mouse scroll itself in combination with a key combination to make changes :
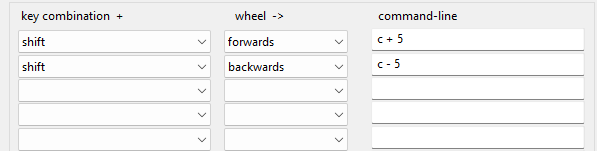
In the above scenario, just hold down the Shift key to make the scroll function decrease or increase the contrast (scroll down -> c – 5 , scroll up -> c + 5 ). Of course, there are many more uses, because we can use all functions from the command line.
Read Also: Best Computer monitors of 2021-2022 – TOP 10
Where to download ClickMonitorDDC?
We will download the program for free from the following websites:
We will download the program for free from the following websites:
ClickMonitorDDC 7.2 – Download
ClickMonitorDDC 7.2 – good programs
Download ClickMonitorDDC – MajorGeeks
Supported Operating Systems:
Windows XP / Vista / 7/8/10/11
License: freeware