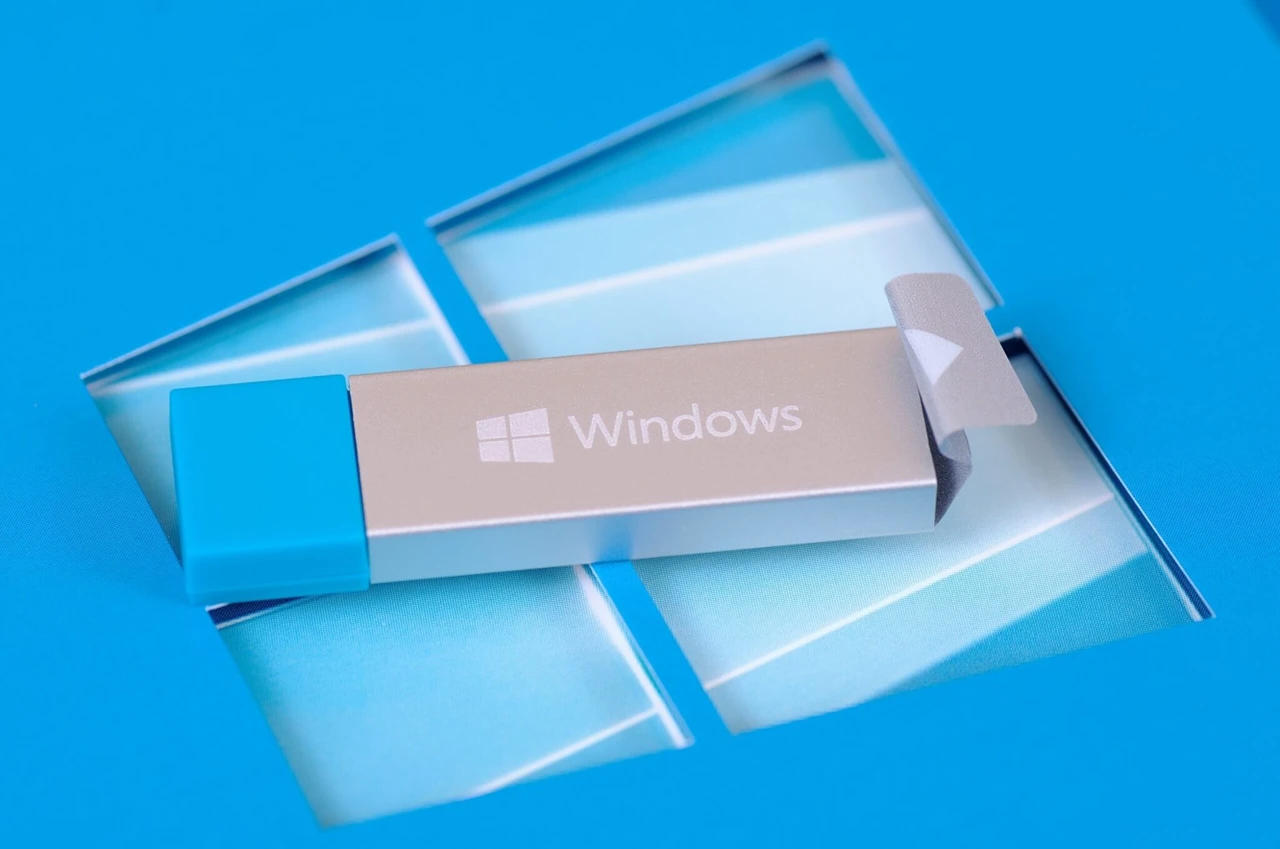
The times in which we installed the operating system from a DVD are irretrievably gone, and the number of devices equipped with a drive is decreasing year by year. It’s a good idea to think about a backup plan ahead of time and have a ready-to-use Windows installation disc. We suggest how to make a bootable USB flash drive with the system using only free software.
Contents
Bootable USB flash drive – what should you know about it? Why is it worth having a system on a USB stick?
A bootable pendrive with Windows is a flash memory which, after appropriate formatting and preparation, will be detected by the computer at startup as an installation medium . Although the boot operation itself will not differ significantly compared to the classic DVD (we choose a different option in the boot menu, more on this in a moment), this solution has several significant advantages resulting from the technological advantage of these small and inconspicuous devices.
In addition to the obvious, i.e. the possibility of using the USB port in the era of computers and laptops without a drive, it is worth considering, among others better performance and high capacity . Among the models based on the USB 3.0 standard, we can easily find equipment that offers fast transfers and data bandwidth, and such a specification can significantly shorten the system installation process. The capacity is also important, as Windows 10 and 11 already require a minimum of 8 GB of data space.
The USB flash drive is also a compact device , which facilitates possible transport (in fact, if necessary, we can even carry it in a small pocket) and more resistant to damage . Enclosures are often made of aluminum or good quality plastic, and therefore of materials that well protect the electronics inside. We do not have to worry about scratching the precious plate and focus on taking special precautions.
Beyond the above, there is the issue of pragmatism . If we do not have a second device at home that would allow us to prepare a bootable flash drive in the event of a failure, it is wiser to prepare such a medium in advance. In the event of a black hour, the ability to install the system without delay can be worth its weight in gold.
How to make a bootable USB flash drive with Windows official Microsoft tool – Media Creation Tool?
This is the simplest and recommended method that requires little intervention on the part of the user. The entire operation of downloading the installation files and preparing the USB device will be performed by the manufacturer’s Media Creation Tool program , available on the following pages (we immediately choose the version of Windows that interests us):
Download Windows 10 (microsoft.com)
Download Windows 11 (microsoft.com)
After going to one of the above addresses, click on the Download Tool or Download Now button :
Before starting the software, let’s prepare a USB drive – as I mentioned earlier, a memory with a minimum capacity of 8 GB of data space is enough (preferably drives with good read and write parameters). Remember that all data on the medium will be deleted.
The first step will be to accept the license terms and select Create Installation Media (USB flash drive, DVD, or ISO file) for another computer :
In the next window, we have the option to change the language and version of the system . In most cases, the default options selected by the application will be correct, but let’s make sure everything is correct. If we do not use archaic software that works only on the old x32 architecture, we recommend installing the 64-bit version.
In the next step, we select the USB flash drive option as the installation media and indicate which device we mean from the list of disks:
At this point, the proper process of downloading installation files, formatting the flash drive and copying data will begin. At the very end, we’ll get a feedback message Your USB flash drive is ready .
How to make a bootable USB flash drive with Windows using Rufus?
Alternatively, we can download the Windows image in the form of an ISO file , which will be used to prepare a flash drive with the free Rufus software.
The image for both systems (Windows 10 and 11) will be downloaded with the Media Creation Tool mentioned above (in the Select a medium to use window, select ISO file this time ) or directly from Microsoft’s website:
Downloading disk image (ISO) Windows 11 (microsoft.com)
After the file is saved to disk, it’s time to run Rufus . We can download the free application from the website:
Rufus - Create USB bootable media the easy way
Let’s take a look at the top of the window. In the Device tab , select the appropriate flash drive from the list, and then click Select , indicating the location of the downloaded ISO image:
Now all you need to do is check if everything is correct:
- in the Image options tab , you should see the Standard Windows installation option ,
- partitioning scheme: GPT (required by Windows 11), target system: UEFI (no CSM) ,
- we leave the filesystem and the size of the allocation unit unchanged.
- The formatting and copying of data will begin after pressing the Start button and closing the message stating that all data has been deleted from the USB flash drive.
How to boot from a USB stick? What to do after installing Windows?
Boot from a USB stick is not a complicated procedure. It all comes down to calling the boot menu at startup or entering BIOS / UEFI and changing the boot order of the disks – we are interested in setting the priority for the USB drive, which we previously prepared using the methods described above.
In the first case, the menu is most often called with the function keys right after turning on the computer. It is worth paying attention to what is written at the bottom or at the top of the screen, because each manufacturer uses a different shortcut key (most often used: Esc, F8, F9, F10, F11 or F12 ). Such information should also be easily found in the Google search engine by entering the model of the laptop or motherboard in combination with phrases such as boot device menu keyboard shortcut . We can also always consult the manual of the device.
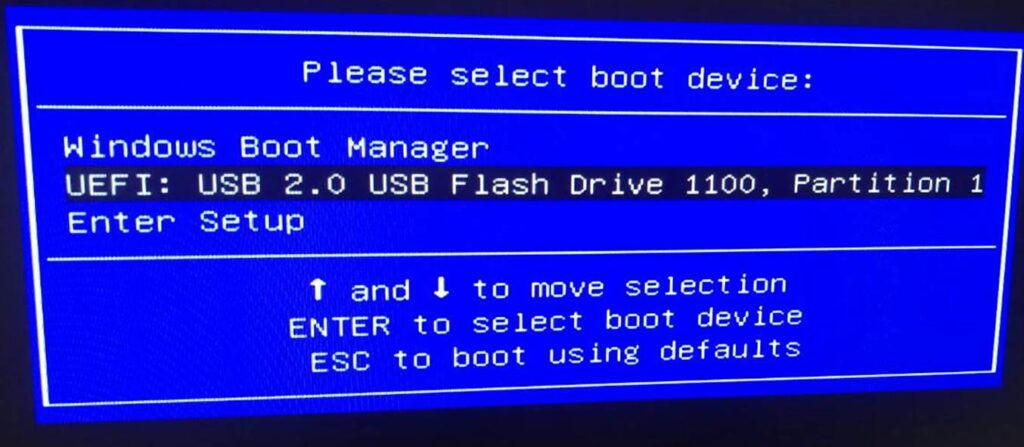
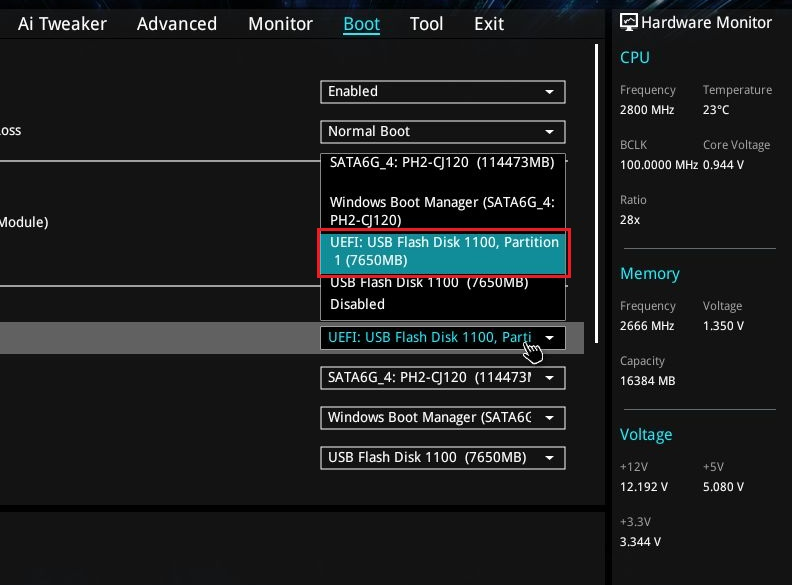
However, if it turns out to be problematic, use the functions embedded in the BIOS or UEFI system (usually at the start it is enough to press the Delete key to gain access). Find the Boot tab or a similar one and select the pendrive from the list of devices:
After completing the system installation process, the question remains – what next? We can deal with the subject of configuring settings and installing programs comprehensively, but it is worth making this task easier and to some extent automated. We write about all this in the text:
THIS IS THE FIRST THING TO CHANGE IF YOU JUST INSTALLED WINDOWS 11
Installation of Windows 11 without TPM and supported processor. How to bypass security?